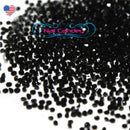
Jet Black Micro Pixies For 3d Nail Art
Categories: Pixies / 1.1mm
Color – sent randomly with same function
- This is for a total of 1440 Pc. for One size per bag.
- Color: (Please note that because of the nature of coating, it is very hard to capture the true color because of the reflections.)
- (ss) refers to stone size. / (mm) refers to millimeter
- Stone Sizes to Metric Conversion: 3ss ( 1.35 - 1.5mm ), 5ss ( 1.7 - 1.8mm ), 8ss ( 2.3 - 2.5mm ), 10ss ( 2.7 - 2.9mm ), 16ss ( 3.8 - 4.0mm ), 20ss ( 4.6 - 4.8mm ).
- Type, Style & Shape: Flat Back Foiled, No-Hotfix, Round.
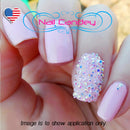
- Size chart shown is to assist of measurement, *chart image is not to scale
- Application Types: Topcoat, Gel, Uv, Led, Nail Glue
- Acrylic Nail Types: Square, Stiletto, Almond, Ballerina
- Special Occasion: Dance, Prom Nails, Wedding, Bridal, Birthday Party
Summary: How to Apply Crystals in Nail Art SETTING CRYSTALS WITH GEL POLISH (to acrylic or natural nail)
- Step 1: Apply gel foundation, cure under the LED/UV light. Then apply gel color of your choice, cure under the LED/UV light.
- Step 2: Prepare the nail with an emery board to roughen area to where crystals will be applied. Then, wipe nails clean with rubbing alcohol using a lint-free wipe.
- Step 3: Apply a gel top coat to the entire nail. Use a wax pickup tool to pick up the crystals and arrange the crystal in the design of your choice. Cure under the LED/UV light.
- Step 4: Place a drop of gel top coat onto a non-porous surface and dip a small detailing brush into it. Using the detailing brush, apply the top coat around the crystals, sealing the edges and creating a "prong" setting. Cure under the LED/UV light.
SETTING CRYSTALS WITH NAIL GLUE ON POLISH (For best results, we recommend setting Swarovski crystals into gel)
- Step 1: Apply base coat and nail color of your choice to the nail and allow to dry.
- Step 2: Add a small amount of nail glue to a toothpick and place on the polished nail, only where you want to add the crystal.
- Step 3: Use a wax pickup tool to pick up the crystals in the design of your choice.
- Step 4: Place a drop of top coat onto a non-porous surface and dip a small detailing brush into it. Using the detailing brush, apply the top coat around the crystals, sealing the edges and creating a "prong" setting. Carefully apply top coat to the remaining surface of the nail. ns that it is temporarily unavailable.
Other Uses: Jewelry Making, Shoes, Scrap Booking, Apparel, Phone
Consumer Audience: Diy, Salon Techs, Manicurist, Nailists